Monday, August 31, 2009

Packing How-to's: Clothing

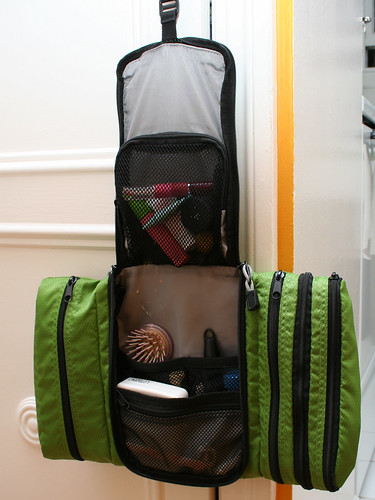
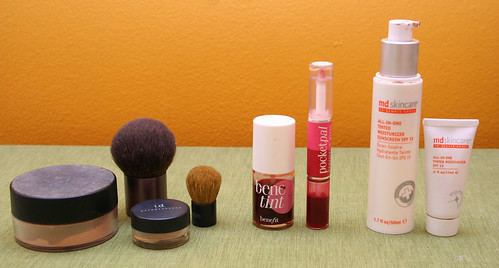
I began my packing how-to's series by talking about some strategies for packing toiletries and beauty products, followed by a post covering the products, containers, and bag I use when I travel. Today I'm continuing my packing series with a discussion on strategies for packing clothing, shoes, and accessories. For this post I've included some more of my favorite photos from past trips, and in the next installment I'll show you the clothes I'm bringing with me to Argentina and the bags I'm carrying everything in. All the photos are clickable, and the key to the locations is at the bottom of the post.

I'll be honest; packing clothing for a trip is still a challenge for me, even with as much traveling as I've done, so I'm not going to sit here and tell you there's a simple formula to follow. Particularly if you're going somewhere you've never been before, it's always going to be tough to figure out precisely what weather to pack for and what level of dressiness you'll need to achieve. But there are a few guidelines that I follow when selecting a travel wardrobe, and I'll share those with you today. Of course, much of this is based upon my own personal travel style, so take it with a grain of salt; you may have very different priorities when you travel.

As I mentioned in one of my earlier posts, I always try to travel with carry-on luggage only. I do this for several reasons: it saves time when I reach my destination; I know my bag won't get lost, misplaced, or roughed up by the baggage handlers; and most importantly, I know the luggage will be easier to manage if I'm not planning on staying in one place for the entire trip. Tipping a 50-pound bag onto the conveyor belt at the airport is perfectly doable, but what about hefting it into the tiny overhead bins on a train once you get there? If there's one sure way to stand out as the obnoxious, completely clueless American stereotype, surely traveling with huge amounts of luggage anywhere outside the US has got to be it. It's also a great way to become a target for pickpockets, because frankly, you look like an amateur.

Here are the things I tell myself as I'm preparing my travel wardrobe:

You don't need to pass yourself off as a local. I detest people who claim that they're not tourists, but 'travelers.' To me they just sound like snobs. If you're filled with wide-eyed wonder at the amazing beauty and fascinating culture that you've gone to all that trouble to visit, then guess what? You're a tourist. If you're not filled with wide-eyed wonder, then why on earth did you bother? Keep your jaded ass at home and leave the traveling for the enthusiasts. It's okay to be an unabashed tourist; rather than cramming your bag full of fancy accoutrements to try to emulate the elegant locals, take along a limited wardrobe that's comfortable, practical, and that represents your personal style. You can still look stylish, but understand that part of traveling light is living without a lot of the embellishments you have at your disposal at home.

Remember that you will shop. I'd much rather pack light and shop heavy, so I always make sure to leave plenty of space in my luggage for the purchases I'll accumulate along the way. I also assume that the clothing I buy for myself will get worn on the trip, and I pack fewer clothes based on that assumption.

There's no need to scale up your travel wardrobe for longer trips. I pack about a week's worth of clothing whether I'm traveling for a week, 2 weeks, or a month. ONE week's worth, no more. Exactly what I take will vary with the length of the trip, but not how much. For instance, for longer trips I will pack more of the super-lightweight layering pieces that can easily be washed in the sink, and avoid items that require any sort of special cleaning. For shorter trips, I assume that I won't wear each individual piece enough to bother with cleaning it as long as I wear a layer underneath. Of course, whether or not smoking is allowed indoors weighs heavily into this decision; I avoid anything that can't easily be washed if I'm going to smell like smoke after every dinner or evening out.

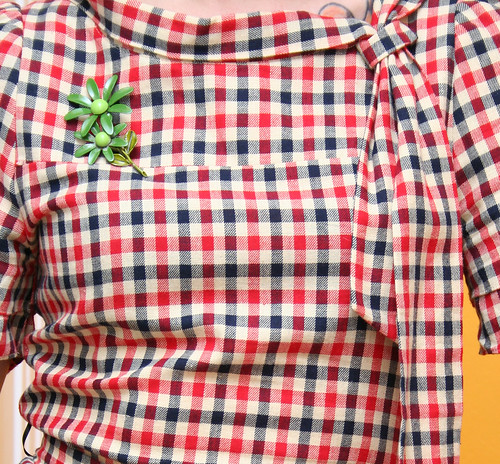
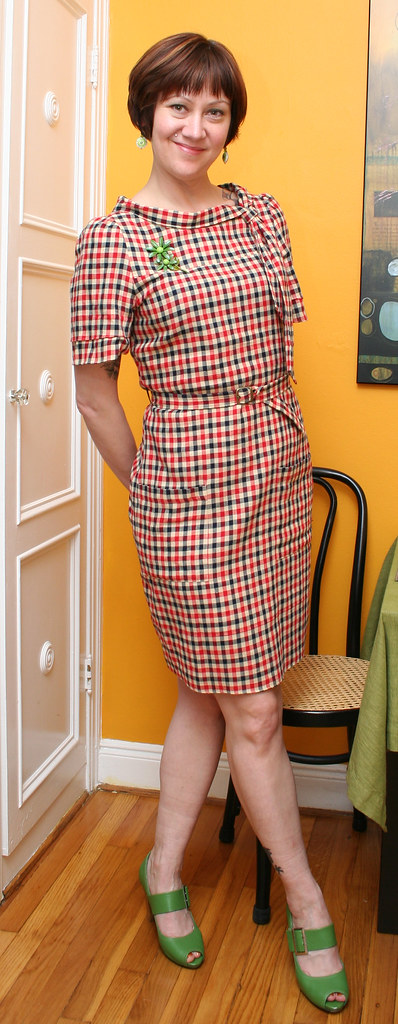
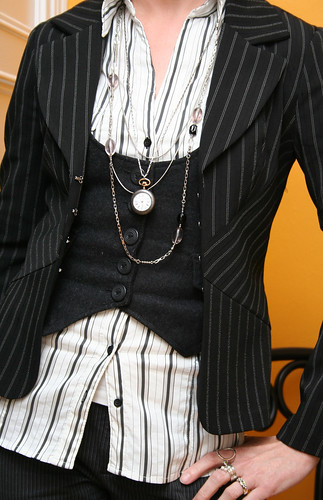
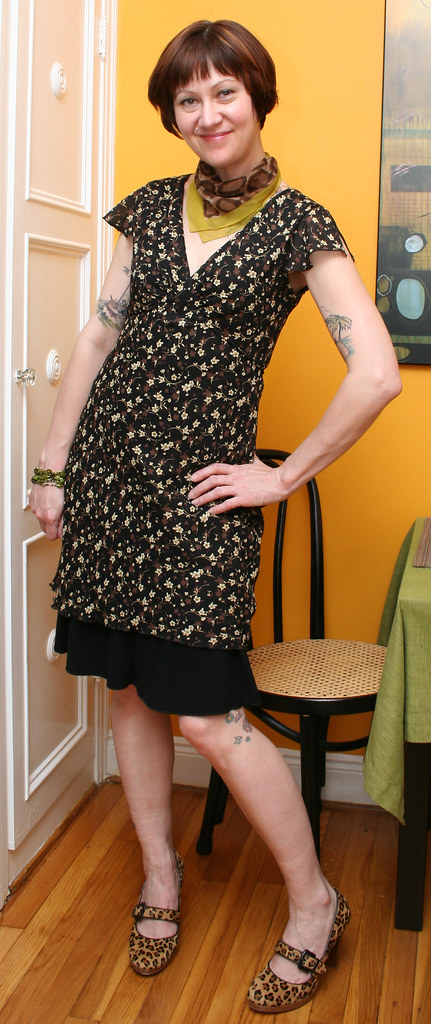
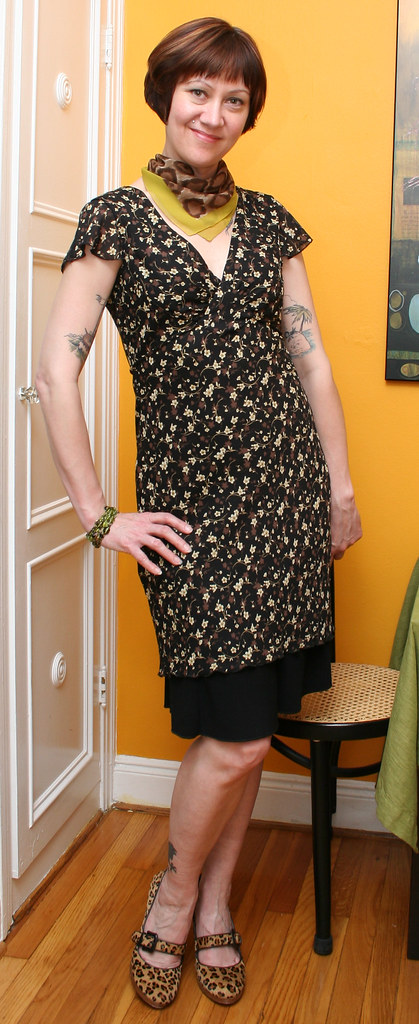
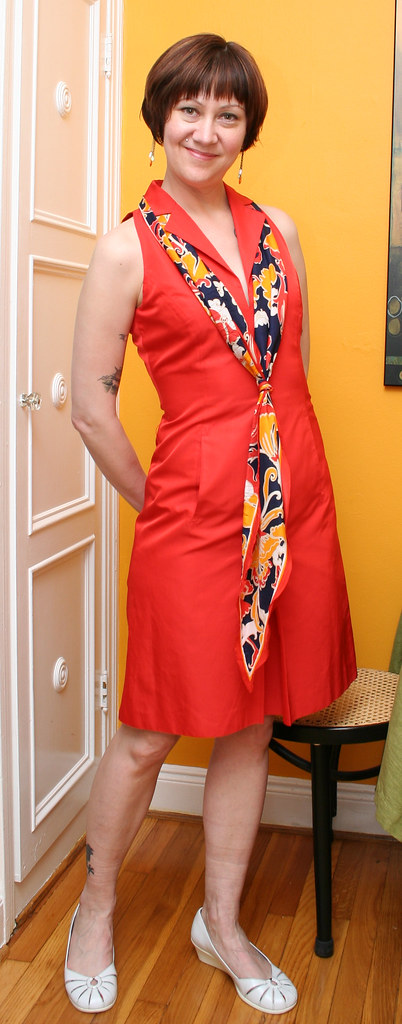
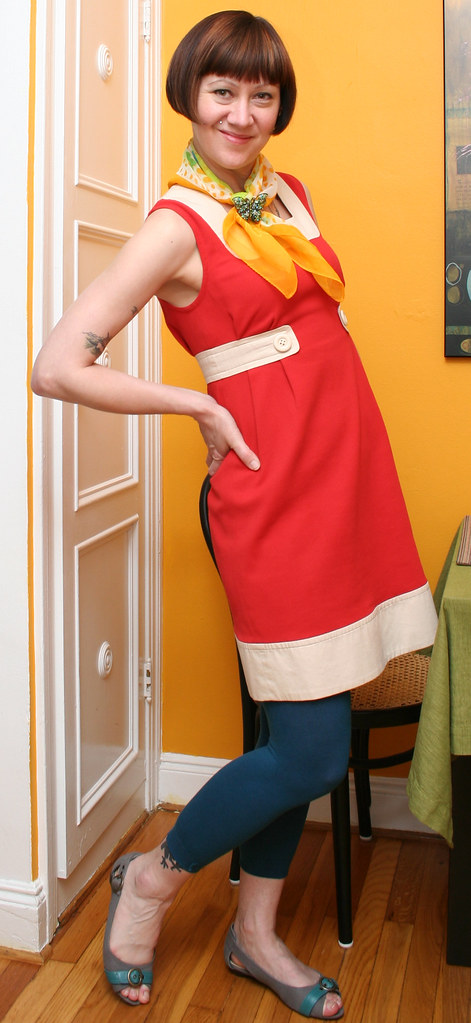
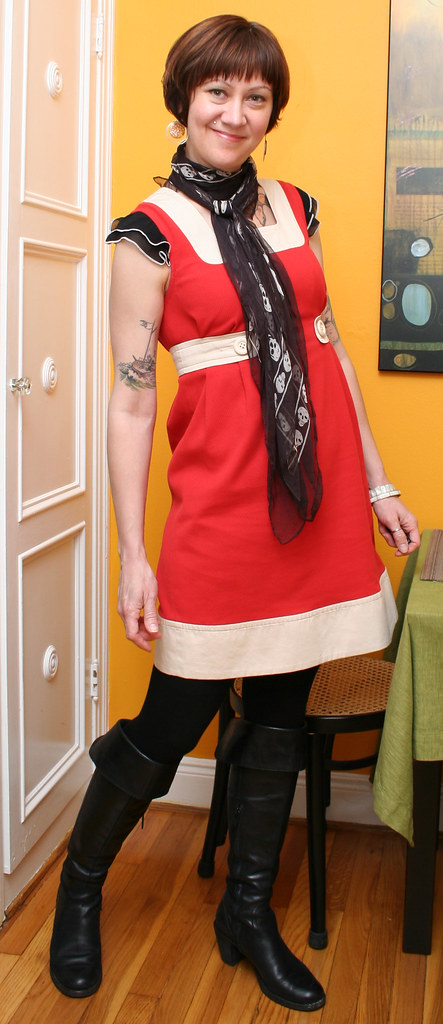
Mix it up with accessories. Small, lightweight accessories are a great way to mix up a very limited wardrobe and make different outfits out of the same basic pieces. I always make sure to bring at least a couple of scarves, a hat or two, a few pieces of jewlery, and at least one belt. Items like these are compact and don't add a lot of bulk or weight to your luggage.

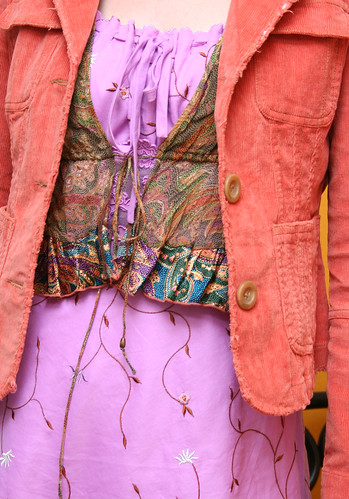
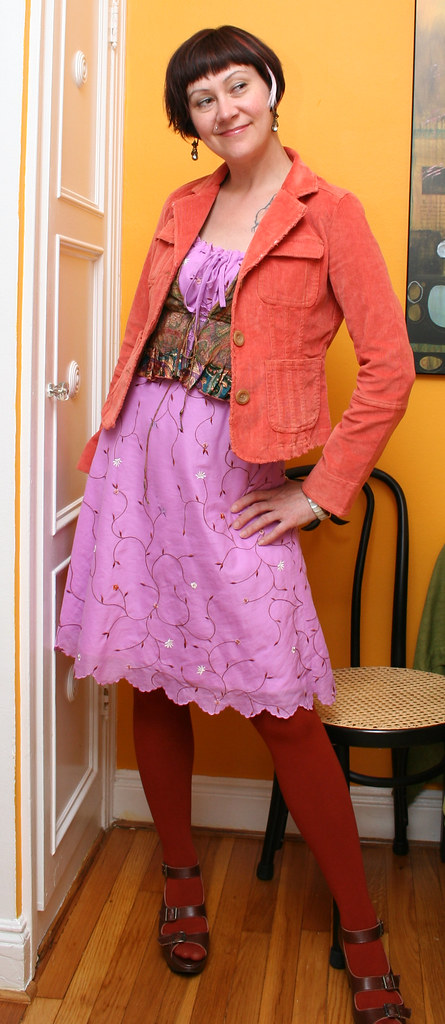
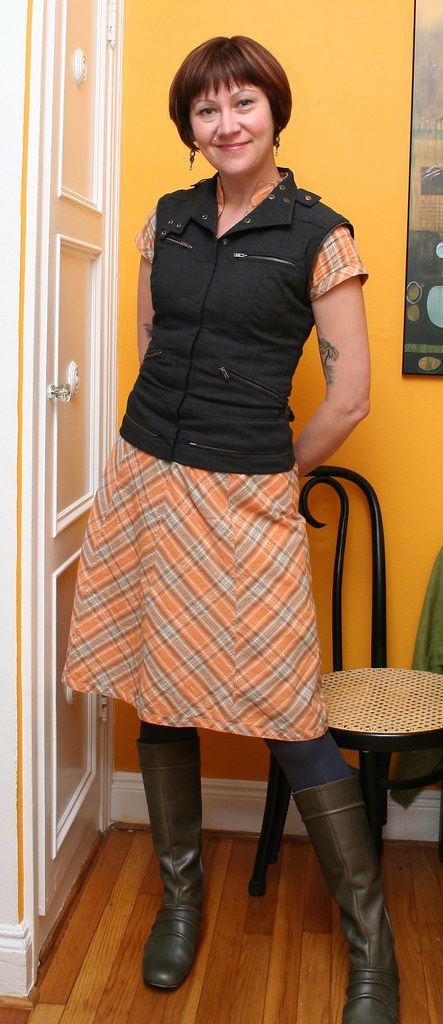
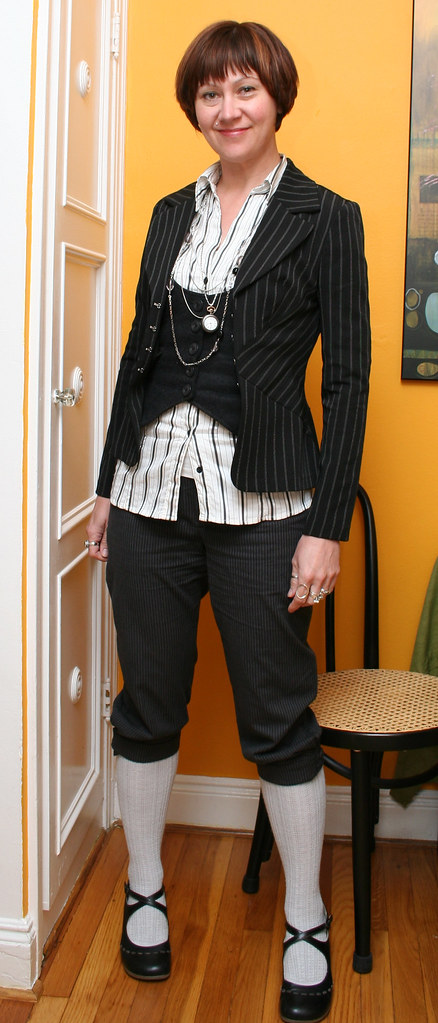
Look for items that serve multiple purposes. Any guesses as to which jacket I'm 
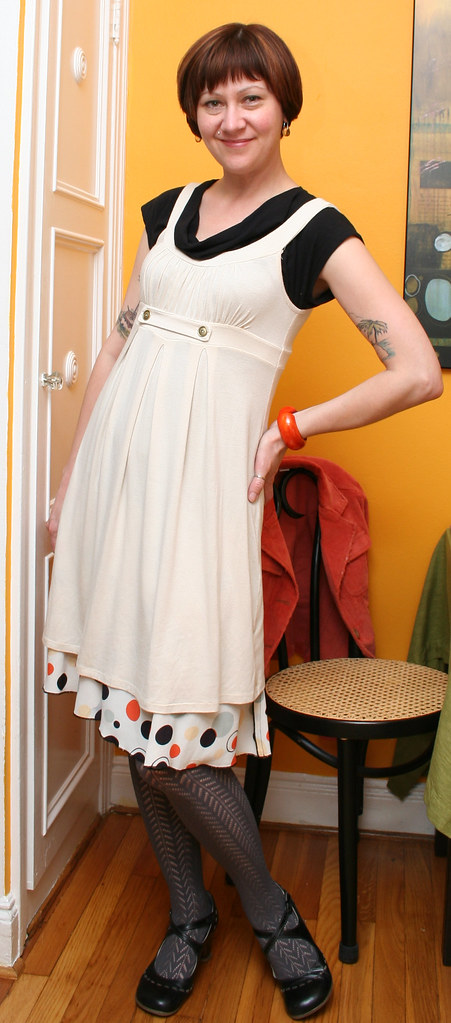
bringing with me to Argentina? That's right, the one I can make from my 5-in-one flight suit. The whole piece is coming with me, so it's an entire outfit by itself, or a jacket, or a vest. The most valuable travel pieces will always be the ones that can double as something else. Also in my suitcase for this trip are a few short dresses that can be worn as tunics over either jeans or a skirt.

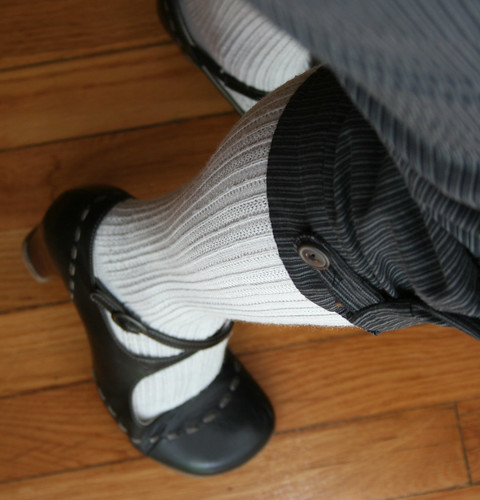
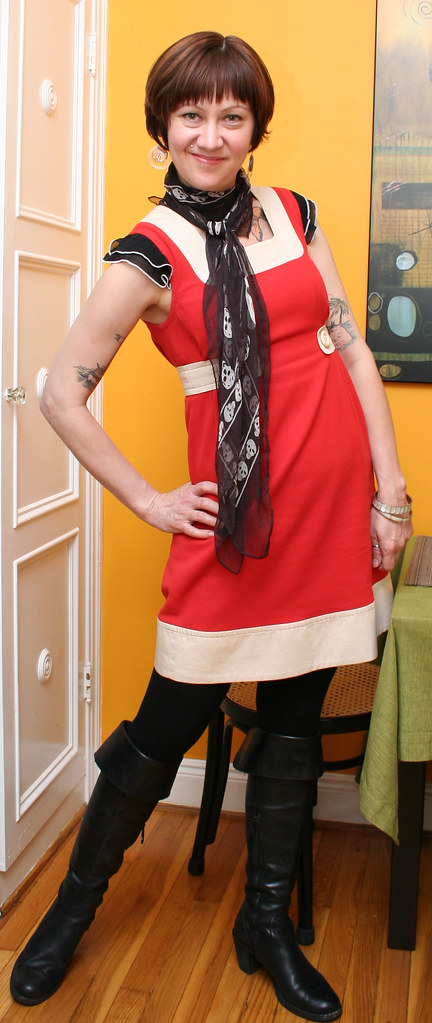
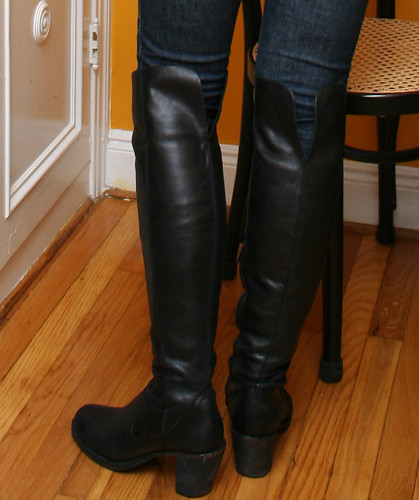
Plan around the shoes. I'm on my feet a LOT when I travel, day after day. Thus the shoes I take with me must not only be comfortable for walking all day, they must be comfortable for walking all day for several days straight. Depending on where I'm going, they might also need to accommodate cobblestones or unpaved surfaces. They need to look good with skirts and pants. As you might imagine, very few pairs of shoes meet all these requirements, therefore when I'm packing for travel I always start with the shoes first and build the rest of the wardrobe around those. I limit myself to 2 pairs of shoes (unless the third is flip-flops for the beach or pool), since they tend to take up the most space, so I really make sure that those 2 pairs will go with everything.

In the final installment of this series, I'll show you what I've packed for my upcoming trip, as well as the luggage I keep it in. I'll also share some tips for making efficient use of space in your luggage.

1. Library at Strahov Monestary, Prague, Czech Republic
2. Painted skulls at the Beinhaus, Hallstatt, Austria
3. The beach at Tulum, Mexico
4. Near Kronborg Castle, Helsingør, Denmark
5. Flaming shots of Black Balsam, Riga, Latvia
6. Kärnan tower at Helsingborg, Sweden
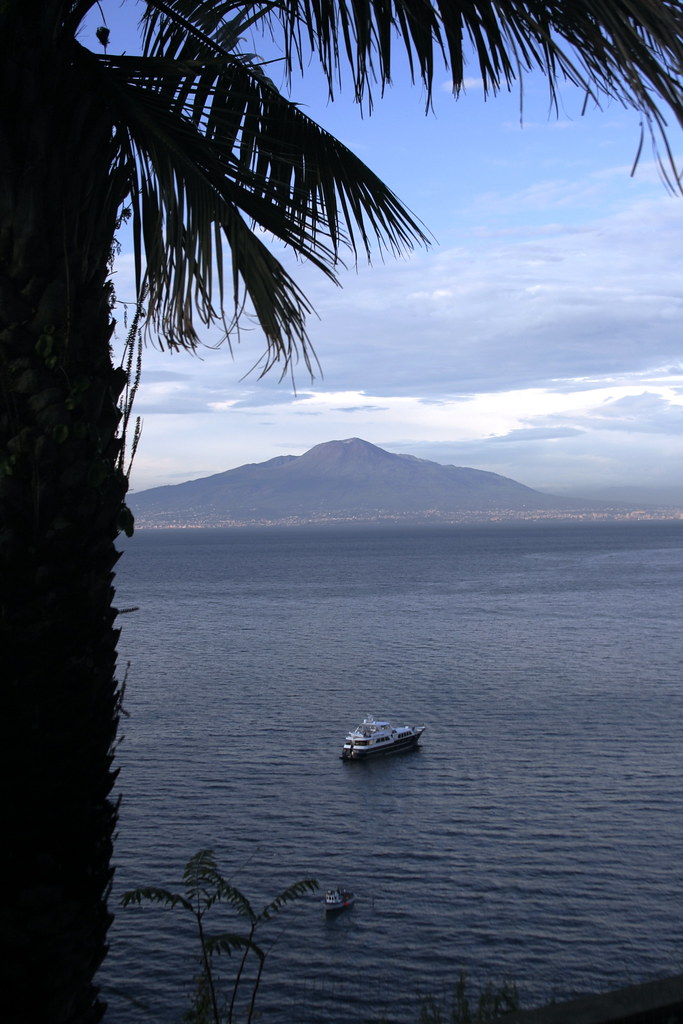
7. View of Mt. Vesuvius, Sorrento, Italy

Friday, August 28, 2009

Challenging

I think this might be one of the most challenging color combinations I've tried to date. Here's how it all came to be:

The Goal: To wear this summery dress and summery shoes before the summer is officially over.

The Problem: It hasn't really felt very much like summer, well, pretty much all summer. And last week it took an even colder turn for several days. But damn it, I wasn't going to let that stop me.

The Solution: Tights, of course. And since I just love the way tights look with platform sandals, I was off to a good start.

The Dilemma: The only tights I had that worked with this pinkish-purple dress/brown shoes combo were a rusty orange color, making it exceedingly difficult to fill out the top half of the outfit. Compound that with the fact that the midsection of this dress has a see-through panel that absolutely must be covered up for work, and I was fairly well stuck.

The Fix: Since I don't actually have anything else in precisely that rusty shade of orange, I chose this busy patterned cardigan, which has several shades that are close. The mixed shades of orange and brown in the cardigan help to bridge the bright orange jacket with the brownish-orange tights. There's even a little purple in the cardigan as well, which helps to tie the dress in with the other pieces. I've discussed this cardigan at length before, because it seems to be a critical piece when I'm trying to pull off a difficult color combination.

In case you're wondering, that pink streak in my hair is an extension that my hairdresser put in just for fun when I went in for my most recent cut and color. It lasted a few days and then fell out because my hair is so straight and slippery. It was fun while it lasted though, and makes me want to do an actual contrasting streak the next time I go in.

Jacket: Tulle
Cardigan: Hale Bob
Dress: Betsey Johnson
Tights: Sock Dreams
Shoes: John Fluevog

Thursday, August 27, 2009

Serendipitous

Here's my amazing 5-in-one flight suit, worn without the sleeves and shorts, and looking very much like one of the trendy moto vests I've been seeing all over the place. Another serendipitous pre-trend purchase, just like my convertible boots.

I've also worn this piece as a jacket/vest combo for a Girls' Night Out, where I went outside with the jacket sleeves on and then once inside I removed the sleeves and wore it as a vest for the rest of the evening. The best part is that the sleeves can be folded up and fit into a medium-sized purse, which means I don't have to haul a jacket around when I go out. This is truly a phenomenal piece of clothing.

The vest has a small, subtle plaid pattern, which goes nicely with the busier and larger pattern of the dress.

Vest: Shawna Hoffman
Dress: Tulle
Boots: Fly London

Wednesday, August 26, 2009

Shockingly Simple

Here's another outfit that, compared with my usual looks, is shockingly simple: dress, shoes, and basic accessories. And like the one with the orange dress that I posted last week, you can see the horrid-looking sock marks from the outfit I had on before this. Damn those high resolution digital cameras.

This dress is busy enough that it can't really take too much accessorizing. Here I've paired it with just some solid splashes of green; the last time I wore it I had a tiny amount of pattern mixing at the hem, but I made sure not to introduce any other colors besides the red and blue.

Dress: Suzabelle
Brooch: vintage
Shoes: Gabriella Rocha

Monday, August 24, 2009

White Rabbit

This outfit sort reminded me of a cross between an English schoolboy uniform and the white rabbit from Alice in Wonderland. Since the vintage pocket watch doesn't actually tell time anymore I suppose I was more like the white rabbit, though I still managed to make it to all my meetings on time.

This outfit was inspired by one I saw in the new Noa Noa fall lookbook, which is filled with all sorts of gorgeous things. Noa Noa's version has harem pants, which I truly loathe, but I loved the rest of the look and thought these cropped pants, coincidentally also from Noa Noa, looked far better. I hadn't actually noticed before that there are 2 positions to button the pant cuffs; buttoning them tighter as I did here puffs the legs out a little and accentuates the riding breeches vibe.

I think I've worn this pocket watch pendant pretty much every time I've worn this gray waistcoat. It hangs in just the right spot to add contrast against the dark wool, and gives the waistcoat a classic look. For this outfit I also added another multi-chain necklace to make the outfit a little more feminine. I wore lots of silver rings but avoided earrings because I felt it would take too much away from the menswear vibe. I left the shirt untucked to add a somewhat slovenly charm, but more because I really just hate tucking in my shirt. It must be that naughty schoolboy side of me.

Blazer: thrifted
Shirt: Promod
Waistcoat: Last Kiss
Pants: Noa Noa
Shoes: John Fluevog

Friday, August 21, 2009

Crazy-Cheap

This orange corduroy blazer, along with a green one just like it, arrived in the mail last week from Tulle. I got it for something like 7 bucks during their crazy-cheap sale that lasts for all of 3 minutes before the super discounted stuff is gone. The last time they had one of those sales, I was in the market for some casual blazers like this one, but by the time I got to the site all the good stuff was gone. This time I happened to find out about it via Ambika's blog just in time to pop over there and score not only the 2 blazers, but a navy coat, which has been on my shopping list for quite some time. My order totalled less than $30, including shipping. It's like thrift store prices, only everything is new!

Blazer: Tulle
Top: Sunhee Moon
Dress: Lady Language
Skirt: ?
Shoes: John Fluevog

Thursday, August 20, 2009

Packing How-To's: Beauty Products, Part 2

On Tuesday I discussed some general strategies for packing beauty products and toiletries for travel. Today in my packing how-to's series, I'll show you all the containers I keep everything in and how I pack it all up.

First off is the bag I keep everything in. I use this bag to carry quite a bit more than just toiletries; depending on where I'm going and for how long, I might also bring along a small first aid kit, sewing kit, lint roller, laundry soap, a few medications such as antacids and aspirin, and whatever else I think I may need. But no matter how long the trip is, everything must fit into this bag or I start culling things from the pile. This way my toiletries always take up the exact same amount of space in my luggage.

The bag I use is the Pack-it-Flat style from eBags.com. The design is ingenious because you can stack it right in among a pile of shirts and other clothes. It's also much easier to find everything when the containers are arrayed in a single layer. The middle compartment opens up and has a hook that can be used to hang the bag from a towel rack for even easier access.

I just love these little polypropylene containers that I found at REI. The sizes I find to be the most useful are the 2 oz. flat oval, the 1 oz. Nalgene bottle, and the 0.25 oz. pill box. Really and truly, you probably do not need more than 2 oz. of anything if you're only going on a 2-week trip. If I'm traveling for longer than that, I only bring a larger volume of things I know I won't be able to find while traveling and that I absolutely need to have every single day. Not too many products meet those criteria: I'd say my face cream is about the only thing, since switching brands abruptly can cause me to break out. Luckily since I don't go through face cream very quickly, I still bring less than an ounce even for a month-long trip.

Wherever possible, I replace full-sized items with travel-sized ones, even if it means using a different product entirely when I'm on the road. I never used to understand those fervent cyclists who will spend a huge pile of money for a part that shaves 2 ounces of weight off their bike, but after hauling my luggage all over Europe, I totally get it. Saving an ounce here and half an ounce there quickly adds up to a pound, and a pound can make a lot of difference when you're lifting your rolling case into an overhead bin or hefting that backpack onto your back.

When I travel, I replace all my various jars and compacts of eye makeup with the Try Me kit from Smashbox, which is about the size of a credit card and maybe twice as thick. Inside are a couple of colors of eyeliner, brow wax, brow powder (which I use as eye shadow), and cream shadow -- the tiny case, a couple of brushes, and some mascara are all I need for my eyes. I refill my sample-sized containers of tinted moisturizer and loose powder, and I also travel with a mini kabuki brush and the pocket-sized version of Benetint lip and cheek stain, which also includes a clear lip gloss. Compare my travel-sized makeup products with their full-sized counterparts in the photo to the right below. As you might imagine, I'm a total sucker for anything travel-sized, but countless hours' worth of hauling luggage around has taught me that it really does make a difference to scale down every possible item you can.

One last tip I'll share for beauty products is to make use of small sample packets. For instance, whenever you order from beauty.com you can choose 3 different samples with your order. I order from them fairly frequently, and when I do I try to choose things that I think will be useful for traveling. I may not need an intensive eye repair cream or a professional-strength conditioner every day, but after 13 hours of flying I find products like those to be incredibly useful. Since most sample packets have just a couple days' worth of product in them, they make great supplements to your regular selection of beauty products.

Wednesday, August 19, 2009

A Pair of Leopards

This outfit is dedicated to Kasmira, who ages and ages ago suggested that I pair this floral dress with a leopard print. I figured since it had been so long, I'd just pull out all the stops and wear not just one leopard print, but two. I needed a little extra 'grrr' for my workday.

Just before I left the house, I decided to throw on a pair of black tights with this outfit, since the day before I'd been fooled by the weatherman again and went bare-legged only to freeze half to death. Truly warm days in San Francisco are sort of like giant squid: we know they exist, but few people have actually seen one in its entirety. What usually happens to me is that the morning starts out full of sunshine and hope and promise, which is promptly dashed to pieces by the time I make the scant 11-mile journey from my home to the office. In San Francisco we tend to get our warm weather only in small bits and pieces, so generally by the time you've started to believe in it enough to actually start dressing for it, you're too late; the fog has rolled in and it's time to get out the tights and scarves.

Scarf: a local vintage store
Dress: an old one from the 90's
Skirt: a hand-me-up from my sister
Shoes: Saks Fifth Avenue

Tuesday, August 18, 2009

Simple Elegance

When I pulled out this dress to design an outfit around it, I was all set to start layering it up and playing with belts and accessories. But once I put it on, it looked so darned cute* that I decided it didn't need much of anything, so I threw on a scarf, some simple jewelry, and shoes and called it a day. In my constant quest to be original and quirky, I sometimes overlook the elegance that exists in a simple look like this one; it's something I'm trying to get better about.

If it weren't for the scarf, this entire outfit would have cost me under $25. The dress was thrifted for around $7 and needed $12 worth of alterations to adjust the fit, the shoes and bangles were both gifts from friends, and the earrings were purchased at Cost Plus for around $5. Amazingly, the dress is a Carolina Herrera and is basically flawless. I'm still in shock that I managed to pick it up at Goodwill.

Scarf: Banana Republic
Dress: Carolina Herrera
Shoes: BC Footwear

*It looks cute except for the ugly sock marks from the outfit I had on earlier that day; I assure you that by the time I actually wore this outfit, the marks were gone.

Monday, August 17, 2009

Packing How-to's: Beauty Products, Part I

A few days ago I officially started making preparations for my annual Big Vacation, which is coming up in less than a month. This year I'm spending 2 weeks and a few days in Argentina with my good friend Jess; in honor of our upcoming trip, I've decided to do a few posts about packing, since it kinda sorta relates to fashion in a roundabout way. I've included some of my favorite photos from past Big Vacations to accompany this post. All are clickable for a larger view; there's a key to the photos at the bottom of the post.

Today I'll discuss some strategies for packing beauty products and toiletries, with a little of my travel philosophy thrown in there for good measure. This series won't be all in a row; I'll do a couple of posts on beauty products this week, and then cover clothes and shoes once I have a better idea of what I'm bringing.

With all the TSA restrictions on liquids and gels, packing toiletries has become quite a chess game. Not only that, but toiletries account for a fair amount of weight in your luggage, and since I like to travel carry-on, I pay a lot of attention to the weight of the items I pack. Today I'll share my general philosophy and strategies for reducing the amount of toiletries that you pack, and later in the week I'll take you on a photo tour of the stuff I'm bringing to Argentina. Here are a few things you should ask yourself as you're packing up your lotions, creams, soaps, and other sundries for a trip:

1. Do I need to bring it at all? I don't know about you, but I've tried about a hillion jillion beauty products at one time or another: wrinkle creams, dark circle lighteners, eye puffiness reducers, pore minimizers, you name it. Some stay on as regular players in my beauty regimen and some come out only when I have extra-puffy eyes or extra-dark circles. But when I travel, I strip it down to just the staples, because for one thing I don't want to haul all that crap around, and for another I don't want to have to deal with a complicated beauty regimen when what I'm really trying to do is to relax and enjoy myself. Is my skin going to age by 20 years if I don't use that night cream for a couple of weeks? No. Then why bother with it at all? My rule of thumb is that if I don't use it at least 3 times a week, I can live without it while I travel. I also find that letting go of a lot of the daily routine is a sure way to slip effortlessly into vacation mode.

2. Can it be replaced? One of the mainstays of my beauty regimen is good old Dr. Bronner's Castille soap, which I cleanse with morning and night. But as we all know, carrying 2 or 3 weeks' worth of liquid soap onto an airplane is about as pleasant as a dinner date with Vlad the Impaler. So when I travel, I bring my Dr. Bronner's in bar form; sure, it doesn't feel quite as zesty fresh as its liquid counterpart, but it gets the job done and it doesn't need any special handling to get it through security. Wherever possible, I try to replace liquids with solids when I travel.

3. How much do I really need? I can't believe how many people I've seen traveling on a 2-week trip with a full-sized bottle of shampoo, a volume that would easily last 4 months. I buy small, durable Nalgene bottles to fit exactly the volume I need for my trip; I know I planned well when I come home with all the bottles empty. The amount you'll need is often significantly less than you think, so consider measuring it out first and then transferring to the smaller bottle. If you've got a small kitchen scale it's even easier; simply weigh out one day's worth, multiply that by the number of days you're traveling, and then dispense it by weight directly into the travel-sized container.

4. Why not buy it when I get there? When you travel in a foreign country, even mundane tasks such as buying toothpaste become adventures. Travel is all about experiencing new things, and a sure way to do that is to try going about your regular activities in a place where all the packages are in a different language and nothing looks familiar. I've amused myself for over an hour in an Osaka drugstore, just looking in wonder at all the stuff of which I had no idea what it was for; to me half the adventure is in discovering those subtle differences in cultures through which you can learn so much. Intentionally not packing something and having to search for it when you get there can be a fun (and sometimes humbling) way to experience a new place. Make sure you do this only with things you know you'll be able to find, such as toothpaste or shampoo, and if you're not sure of the proximity or hours of drugstores, bring just enough to get you through the first day or two.

5. Is there a clever way to pack it? Okay, I'm going to be honest -- I detest those stupid TSA regulations about liquids and gels, and I'll do just about anything to defeat them. I detest them not so much because they're a hassle, but because they're a hassle that doesn't do a damn thing to improve the safety of flying. So I find ways to beat the system. I'll tell you a secret: those x-rays at the airport don't have any sort of special sensor that detects liquids and gels; the security officers see them in your luggage because of the size and shape of the packaging. A tiny, round, flat case is used for carrying pills, right? Right, unless it's used to carry a small dollop of eye cream. Deodorant containers look exactly the same in an x-ray whether there's a solid in there or a gel (but of course, you already replaced your gel deodorant with a solid for the trip, right?). And then, the tinier the container is, the less likely it is to be noticed; for containers of about an ounce or less, I throw them directly into my luggage instead of worrying about the hassle of the quart-sized ziplock bag. Not once have I ever been stopped for having liquids in my luggage, except for the time I forgot about the flask of Fernet Branca in my backpack. But that's another story.

Later this week I'll show you all my nifty travel-sized containers and how I keep everything organized.

Key to photos, from the top down:
1. Skogafoss, Iceland
2. Trevi Fountain, Rome, Italy
3. Dancing to Afenginn, Copenhagen, Denmark
4. Interior of St. Peter's church, Salzburg, Austria
5. Kitty in jail, Vilnius, Lithuania
6. Český Krumlov, Czech Republic
7. Elderly lady with newspaper, Krakow, Poland
8. Museum of Terror, Budapest, Hungary
9. The Grand Place at night, Brussels, Belgium
10. Shadow and reflection, Paris, France

Friday, August 14, 2009

Below the Knee

Here are those amazingly versatile Modern Vintage boots again, this time making an appearance with the cuffs folded to just below the knee. With the cuffs at this height, they stick out a little further and give the boots a pirate-like look, as opposed to when I wear them folded further down like this. I know it's tough to tell from the photos, but in person the effect is much more noticeable.

While we're on the subject of versatility, this little dress turned out to have far more of it than I ever imagined it would. Every time I've worn it I've assumed it was the last completely original variation I could come up with and the next wearing would have to be a repeat of a previous one, but so far it hasn't happened yet. For a retrospective on the ways I've styled this dress so far, check out the photos below.

Which outfit is your favorite?

Scarf: Duke et Duchess
Shirt: H&M
Dress: Orla Kiely
Boots: Modern Vintage


Thursday, August 13, 2009

Thigh High

Thigh high boots -- holy crap, am I really this trendy? Well, it turns out that I am and I didn't even realize it until a few days ago. This is actually just my trusty pair of Modern Vintage boots that I've worn about a million times, only it recently dawned on me that I could flip up the folded cuffs and voila! I've got my very own pair of thigh high boots. I've had these suckers in my closet for a full 2 years, that's how ahead of the trends I am.

I wore this outfit for Girls' Night Out after yesterday's Libby Smith ensemble. As you can see, the only piece that carried over from day into evening was the vest. The real star of the show was the boots, of course, and I wanted to take a moment to elaborate on why I think a pair like this is a worthwhile investment.

This season it appears that thigh high boots are going to be all the rage, but before you run out and snap up a pair, it's worth considering how versatile they'll be once the trend dies down. I've seen very few pairs that are under the $200-300 range (and far more pairs that are well above it), and if you're going to drop that kind of coin on a pair of boots, it's worth having a style that won't look outdated after just one season. These Modern Vintage boots turned out to be ideal because the cuff can be worn in multiple positions: just below the knee, folded further down for a classic equestrian look, or flipped all the way up as I've shown here for an above-the-knee length. For me it was just a lucky break, but if you're in the market for thigh highs this season, you have an opportunity to make a solid investment with versatility and timelessness in mind. This is yet another way to avoid buyer's remorse!

Boots with foldable cuffs abound this season, but I thought I'd share a few of my picks from Amazon and Endless that I think would function well as either a cuffed equestrian or a sexy above-the-knee:


Pura Lopez L101-B, $398
Pour La Victoire Rena, $209


Apepazza Cagliari, $329
Via Spiga Brook, $256